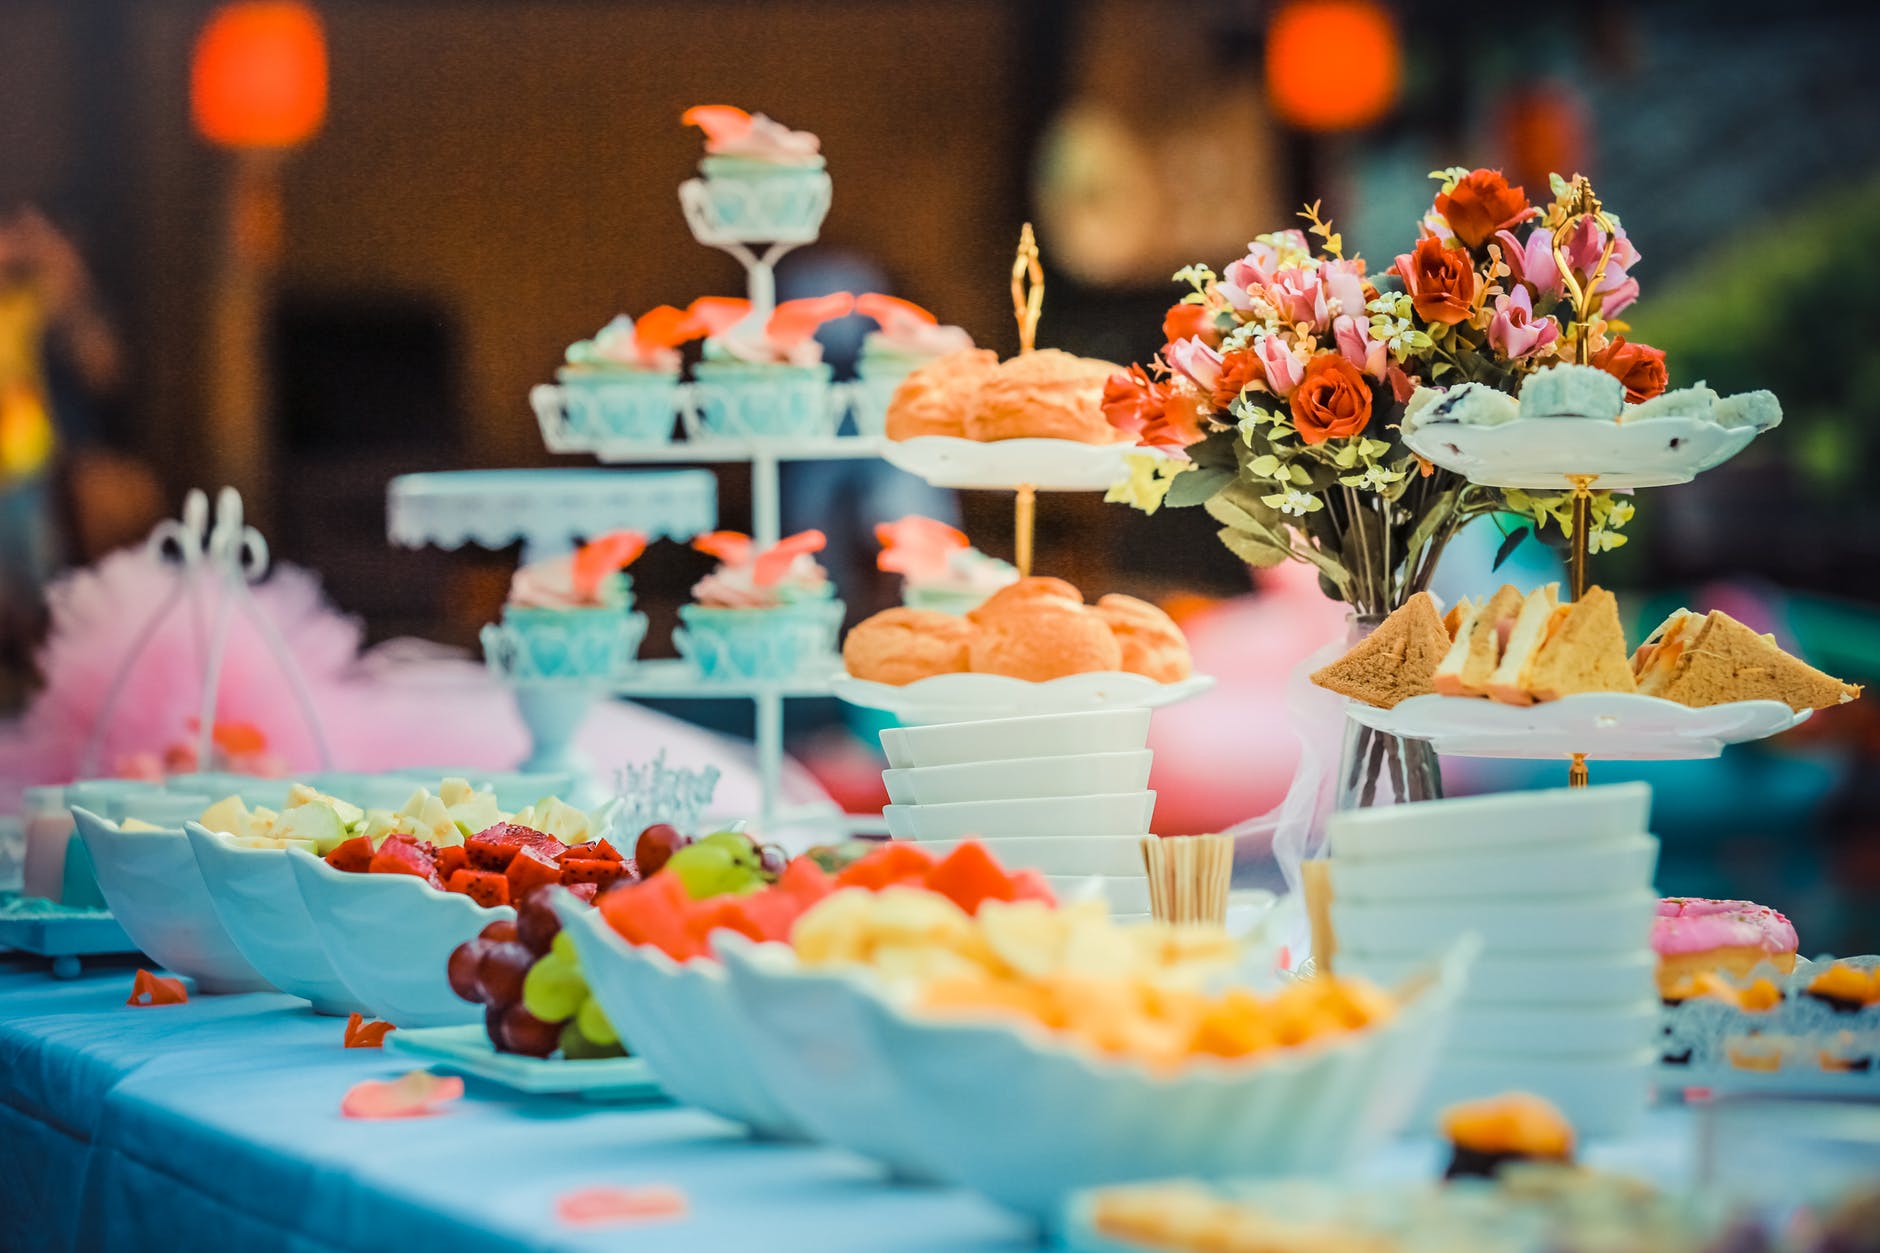
Launched in 2010 and acquired by Facebook in 2012, Instagram has taken the mobile photo-sharing niche by storm, with no signs of stopping soon. When Instagram first came out, all my friends, myself included, started our galleries with Instagramming our food (fun fact: 69% of Millennials take photos of food before eating!). Eight years later, food photography on Instagram is more popular than ever.
Meet Christina, the creator of Addicted to Dates. Guess how I discovered her amazing/very appetizing/super colorful gallery? That’s right. Instagram. Read my interview with her below and make sure to scroll all the way to the bottom of the article to see three of her favorite vegan dessert recipes.
Tell me a little bit about yourself, where are you from?
I’m Christina, creator of addictedtodates.com where I share sweet vegan recipes made with whole food ingredients. I live in Kerry, in the southwest of Ireland. I work part-time in an office by day, but every spare minute outside of that goes into my true passions, which is creating recipes, food photography and advocating for animal rights.
What inspired you to create such a colorful meals/snacks? How did you start developing your own recipes?
I wanted to share with others how easy it is to be vegan and that you can still eat all the delicious foods, without the cruelty and also benefit your health.
There is a misconception that veganism is difficult or restrictive; I used to feel that way as well before I researched the lifestyle.
I studied Culinary Arts in college but lost my passion in the kitchen, as it did not feel right for me at the time. When I became vegan just over three years ago, I started to cook again and rediscovered my love for creating dishes. I began by using just a few base recipes for things such as ice-cream, cheesecakes, brownies, etc. and played around with different flavors and textures to transform them into a variety of dishes. I found it so exciting (and still do) to discover cruelty-free versions of dishes that I used to love.
What are your three favorite ingredients?
This is really tough! I love using lots of different ingredients and would love to have access to more tropical fruits such as dragonfruit and papaya (I could happily live on these!). If I had to choose just three though I would probably go for cashews, Medjool dates (big surprise) and cocoa powder.
Cashews are a staple in my kitchen. I use them to make raw cheesecakes, desserts, cheese sauces and vegan cheese. Cashew butter is probably one of the tastiest things that I keep in my fridge.
Medjool dates are so versatile. I use them in bases for desserts, in a healthy caramel sauce, and to sweeten smoothies.
Cacao powder is a must because it’s so handy for when you are in the mood for something chocolatey. I add it to nice cream (banana ice cream) and to nut butter to make homemade Nutella!
What is your goal, for your Instagram/website?
My aim with the blog is to give people the tools they need to create delicious vegan food that they can share with their friends, work colleagues and family.
The goal is to remove the stigma around veganism and to show people how delicious and abundant the lifestyle truly is, to show people that they can enjoy amazing food while also helping them to feel better, do better for the environment and for the animals.
Christina was kind enough to share with us a few of her favorite recipes. See them below.
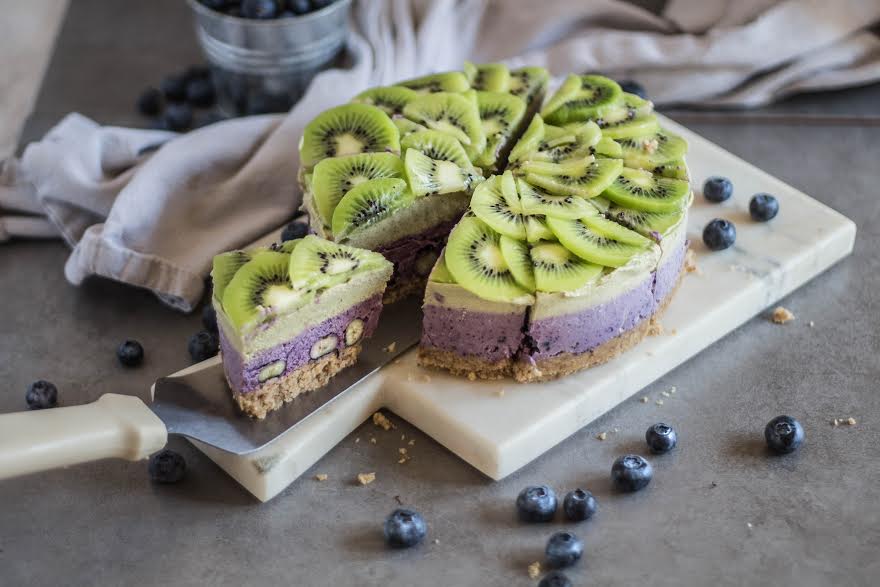
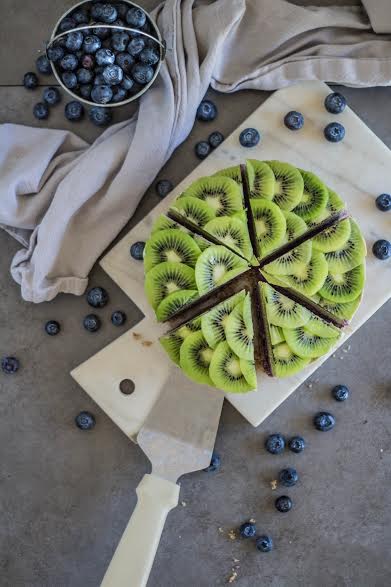
Raw Kiwi and Blueberry Cheesecake
Ingredients
Base
½ cup walnuts
¼ cup macadamias
¼ cup skinless almonds
½ cup Medjool dates (pitted)
¼ tsp Himalayan pink salt
1 cup gluten-free oat flakes
Blueberry Layer
1½ cups soaked cashews
2 tbsp lemon juice
4 tbsp maple syrup
½ tsp vanilla powder or vanilla bean paste
1 cup fresh blueberries
2 tbsp coconut oil (melted)
Additional ½ cup fresh blueberries for garnish
Kiwi Layer
1½ cups soaked cashews
2 tbsp lime juice
3 tbsp maple syrup
3 kiwis (skinned and sliced)
1 tsp matcha powder
2 tbsp coconut oil (melted)
Garnish
3 kiwis (skinned and sliced)
PREPARATION
1. To make the base combine the walnuts, macadamias, almonds, and oats in a food processor
and blend until they form a crumb.
2. Add the dates and salt and blend until it forms a dough consistency.
3. Press the mixture tightly into the bottom of a cake tin and set aside in the fridge.
4. To make the blueberry layer, add the cashews, lemon juice, maple syrup, vanilla and 1 cup of
blueberries in your blender and blitz until smooth and creamy.
5. Lastly, add the coconut oil and blend for another 30 seconds to combine.
6. Pour the blueberry mixture on top of the cake base and distribute the ½ cup of fresh blueberries
throughout this layer.
7. Place in the freezer to set for a minimum of 1 hour or until set.
8. To prepare the kiwi layer, add the cashews, lime juice, maple syrup, kiwis, and matcha
powder to your blender and blitz until smooth and creamy.
9. Lastly, add the coconut oil and blitz for another 30 seconds.
10. Pour the kiwi mixture on top of the blueberry layer and freeze the cake for a minimum of 6
hours (ideally overnight).
11. Once set, you can remove the cake from the freezer and arrange the kiwi slices on top.
12. Remove the cake from the cake tin and allow it to defrost for approx 40 minutes – 1 hour
before serving.
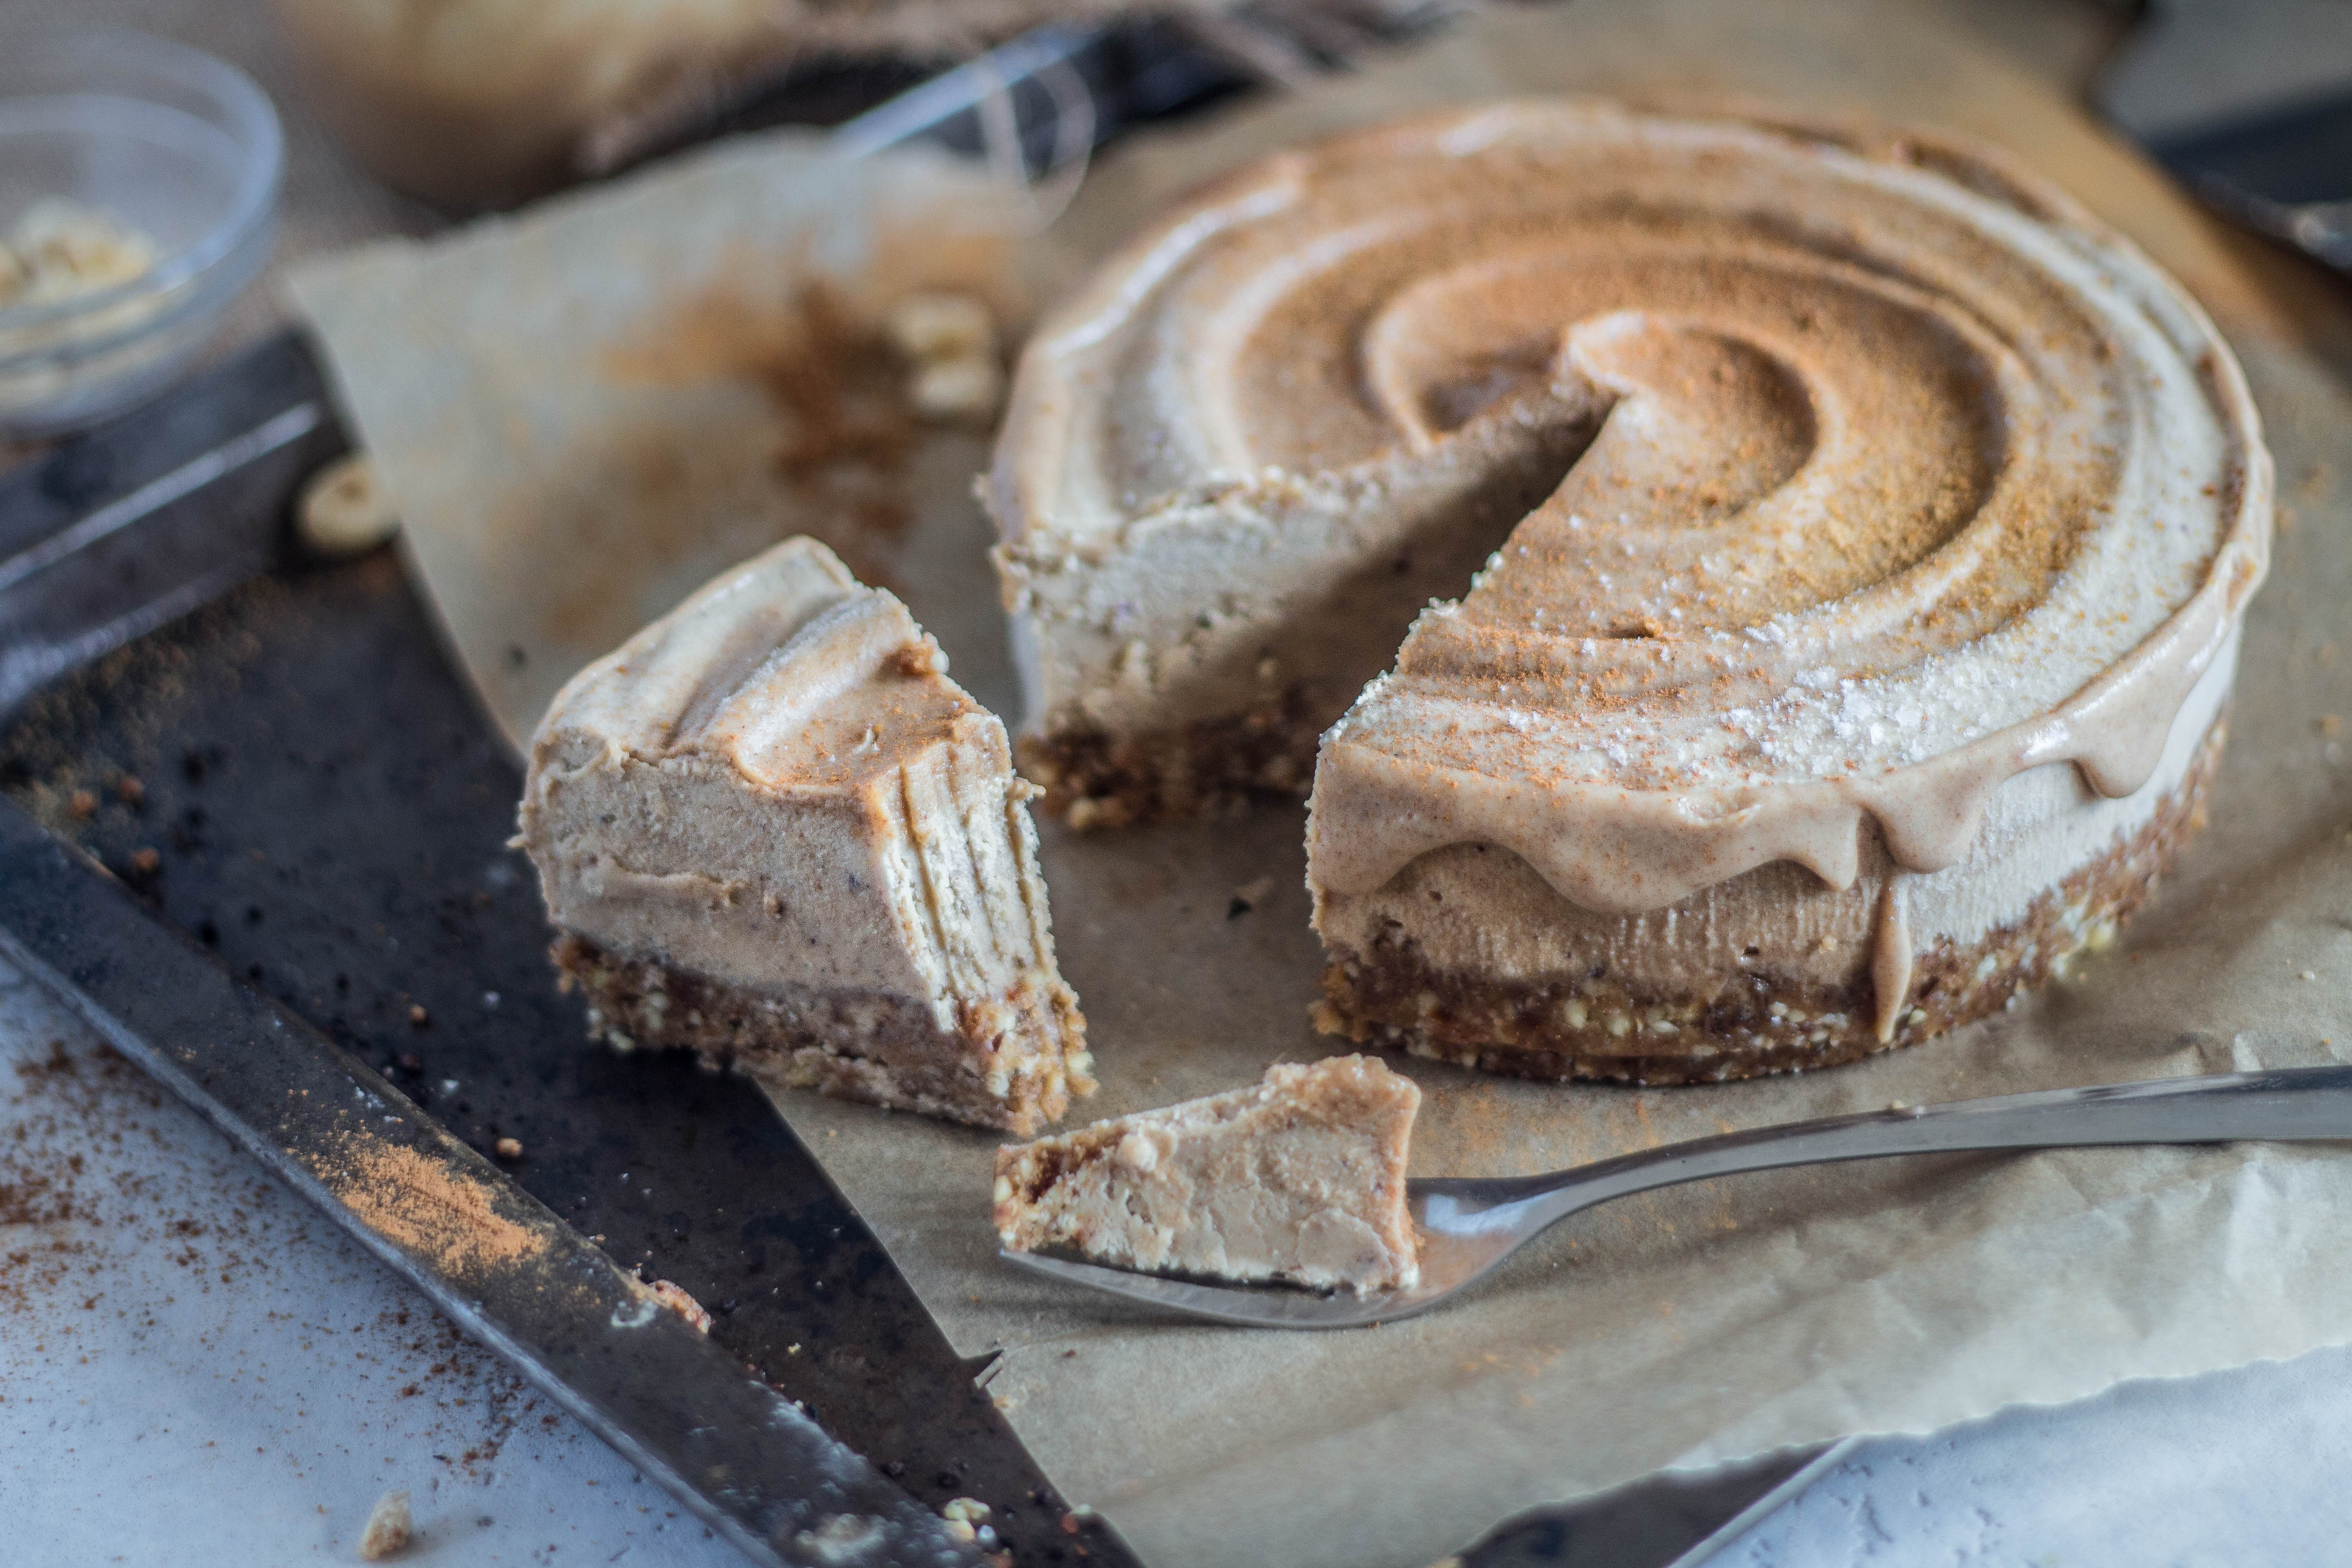
Cinnabun Apple Cheesecake with Salted Caramel
Serves 8-10
Ingredients
Base
1 cup skinless almonds
½ cup oat flakes
10 Medjool dates (pitted)
¼ tsp Himalayan pink salt
1 tbsp almond butter
¼ tsp cinnamon
Caramel
8 Medjool dates (pitted)
½ cup cashew milk (or other plant milk)
2 tbsp cashew butter
¼ tsp Himalayan pink salt
Filling
2 cups cashews (soaked for 6 hours and rinsed)
½ cup maple syrup
Juice of ½ a lemon
½ tsp cinnamon
1 tsp vanilla powder
1 red apple (without core)
1/3 cup coconut oil (melted)
Garnish
2 tbsp coconut oil
1 tsp coconut water
3 tbsp of the caramel mixture (held aside once prepared)
PREPARATION
1. To make the base add the almonds and oat flakes to a food processor and blitz until they are
finely ground.
2. Add the remaining ingredients for the base and continue to blitz until all the ingredients are
broken down into a crumb. The mixture should press together like a dough between your
fingers.
3. Press the dough into the bottom of your cake tin. Pack it down firmly and set aside in the
fridge.
4. To make the caramel, add all the ingredients to your high-speed food processor. I
find that using a Nutri Bullet or Ninja Bullet for this part works best as it takes less time to
blend into a smooth consistency. Make sure that there are no lumps and the caramel is
creamy.
5. Separate 3-4 tablespoons of the caramel into a jar or bowl, cover and set this aside in the
fridge. This will be used later for the caramel glaze.
6. To prepare the filling, add the cashews, maple syrup, lemon juice, mixed spice, cinnamon
and vanilla in your blender. Blend until they are smooth.
7. Add the chopped apple and continue to blend until the mixture is completely smooth and
creamy.
8. Lastly, add the melted coconut oil, and blend further for 30 seconds to incorporate the oil
into the mixture.
9. Pour the filling into a large bowl.
10. Add the caramel to the bowl and gently fold it through the filling using a spatula. You don’t
want to overmix here as the goal is to have a nice marble effect of caramel throughout the
cheesecake.
11. Pour the mixture on top of the cake base. Using your spatula, make a large swirl print on top
of the cake by holding the spatula at the outer edge of the cake and working your way into
the middle whilst spinning the cheesecake tin.
12. Place the cake in the freezer to set for at least 6 hours or preferably overnight.
13. Remove the cake from the tin and set it on a drip tray.
14. To prepare the glaze, place the coconut oil, coconut water and remaining caramel mixture in
a bowl and heat them over a saucepan of simmering water.
15. Stir constantly until everything is melted together. If you find the mixture is too thick, add
another tsp of coconut water until you reach the desired consistency.
16. Use a spoon or piping bottle to drip the caramel glaze around the edges of the cake.
17. Dust the cake with a little bit of cinnamon if you wish.
18. This cake can be enjoyed both semi-frozen or defrosted. I prefer it completely soft as it has a
mousse-like texture. Allow at least an hour for defrosting before serving to reach this
consistency.
19. Store in the fridge in an airtight container for up to five days, or freeze.
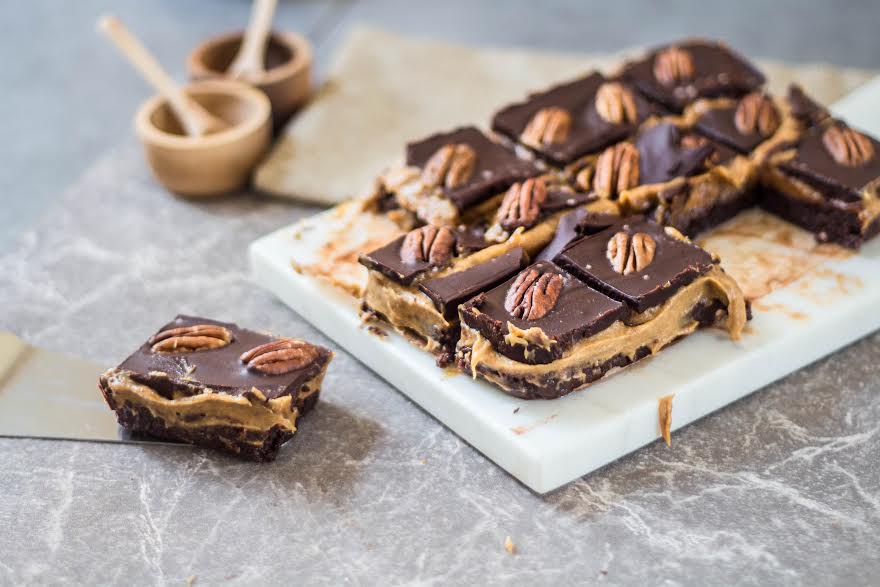
Salted Caramel Brownies
Makes 12 brownies
Ingredients
Brownie Base
2 cups walnuts
1 cup dates
¼ tsp salt
½ tsp vanilla bean paste
1 cup cacao powder
Salted Caramel
1 ½ cups dates (soaked for 4 hours)
1 cup chilled coconut milk (thick part from the top of the can)
½ tsp vanilla bean paste
¼ tsp salt
Chocolate Topping
¼ cup coconut oil
½ cup cacao powder
1/4 cup maple syrup
Some pecans for garnish
PREPARATION
Start by making the brownie base. Add the walnuts to your food processor and blitz for about one minute until finely ground. Add the dates, salt, and vanilla and blend for another two minutes. Lastly, add the cacao powder and blitz for another minute until incorporated.
Line a baking dish/lunchbox with parchment paper and press the brownie dough down firmly using your hands or a spatula to form the brownie base. You can set aside in the fridge while you prepare the caramel.
For the salted caramel, add all your ingredients to your food processor and blend on high speed until smooth and creamy. Check the mix every minute or so, and push down the edges with a spatula. Add the caramel on top of the brownie base and place in the freezer for at least an hour to help it firm up a little.
To make the chocolate, melt the coconut oil and then stir in the cacao powder. Lastly, add the maple syrup and stir until smooth. Pour the chocolate on top of the caramel layer, add pecans and sprinkle of salt. Place back in the freezer for a couple of hours before cutting with a sharp, hot wet knife.
Make sure to check out Christina’s blog Addicted to Dates for more vegan recipes and make sure to follow her on Facebook & Instagram.